Grout Cleaning

Welcome to my Work History archive where you will find detailed examples of the cleaning and renovation of Grout carried out in East London

Cleaning and Renovating Grout

The top layer of grout is porous and can absorb grease, dirt and limescale. Spillages such as wine, lemonades or greasy substances will cause marks and patches in the joints in the floor. Grout between wall-tiles particularly in damp areas like bathrooms will become dirty and unattractive as a result of Mould, Mildew and Limescale.

Mould is one of the most unsightly problems, which usually starts off in the wettest area of the room, this could be the bottom of the shower or bath, then starts to spread and if left unchecked could cover a large area of the wall.

Another common issue we find is a problem known as Grout Haze or Grout Smearing where a thin layer of grout has been left to set on the surface of the tile. Once grout has set it is difficult to remove.

Discolouration of grout joints in bath or shower areas due to continued use of acid formulated shampoos and soaps. This causes yellow orange and pink stains to the grout over even a short period of time. Whilst Grout Joints can be cleaned, badly stained grout may need to be re-coloured.

Protecting your grout in advance with a sealer will prevent most of these issues and although relatively unknown in the UK, protection awareness is growing. Sealing forms an invisible barrier between the grout and the surface, this will then protect your investment for years to come.

We have solutions for all the problems listed above and below you will find detailed examples of work we have carried out in the past to resolve many of these issues. It should give you some idea of what’s involved and what can be achieved with the right techniques and products.


Encaustic Cement Bathroom Tile Cleaning Whitechapel

Encaustic Cement Shower Tiles Renovation in a Whitechapel Bathroom

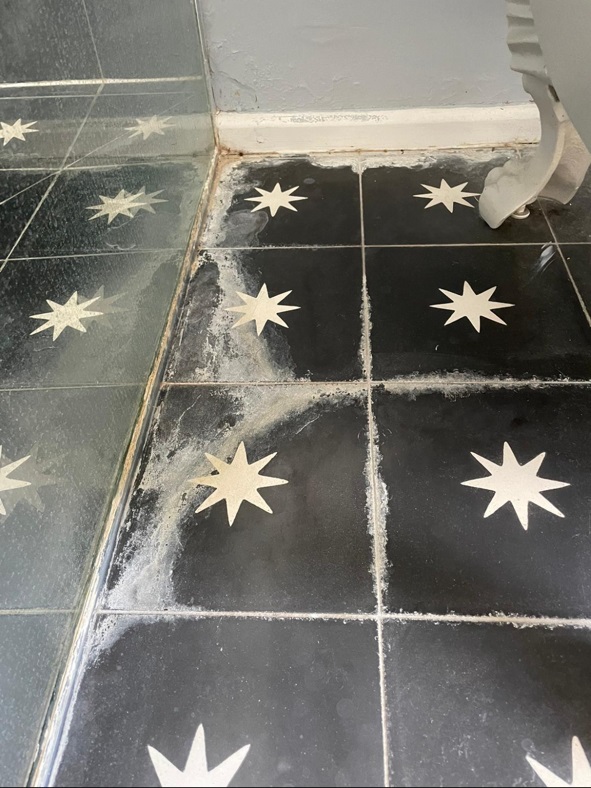
This client from Whitechapel E1 asked me to pop round to see if anything could be done to improve the Encaustic Cement tiles in the bathroom in the bathroom along with the grout which was also in need of renovation. They thought the tiles were ceramic however I suspected they were in fact a modern Encaustic cement tile which do need more maintenance and should be sealed.

As requested, I popped round to take a look and was able to confirm they were not ceramic but encaustic cement which were very popular in Victorian days but with new manufacturing processes and designs are back in fashion.
Encaustic Bathroom Tiles Before Cleaning Whitechapel Encaustic Bathroom Tiles Before Cleaning Whitechapel

Having inspected the tiles and discussing the issues with the owner I discovered they had been using an acid based cleaner to remove the calcium staining from hard water that was evident on the tiles and shower screen. This will have stripped off any sealer that will have been applied leaving them vulnerable to ingrained dirt.
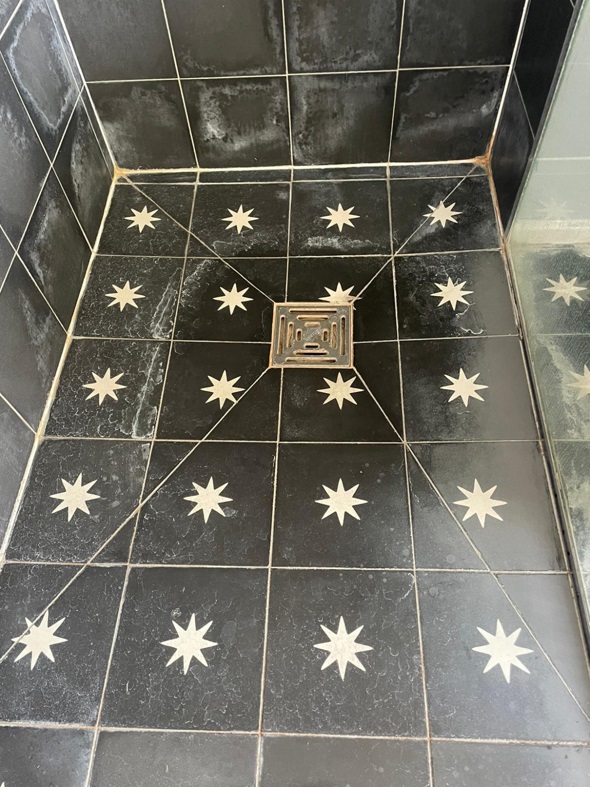
Encaustic Bathroom Tiles Before Cleaning Whitechapel

I was able to re-assure my client that the tiles could be renovated, and I worked out a plan and a quote for doing the renovation. Happy with the price, a date was agreed to start the work.

Renovating an Encaustic Tiled Bathroom

To remove the hard water staining, the tiles were scrubbed with a coarse six-inch 400-grit Tile Doctor burnishing pad fitted to a hand buffer using only water for lubrication. This did a good job of cleaning up the tiles and removing all the calcium and etching caused by the acidic cleaning product. The soiling was rinsed off and then I followed up with finer 800 and 1500 grit pads following the same process. These finer pads re-finish the tiles and build up a bit of a polish in the process.

I left the shower to dry out overnight and returned the next day to apply a sealer which for this installation we used Tile Doctor X-Tra Seal which is rated for use in wet areas. It’s a impregnating sealer that soaks into the tile, occupying the pores and preventing dirt from becoming ingrained there.

The last step was to replace the old silicone sealant which is impossible to get clean once its badly stained. The sealant was cut out with a sharp knife and replaced with new leaving the bathroom looking like a new installation.
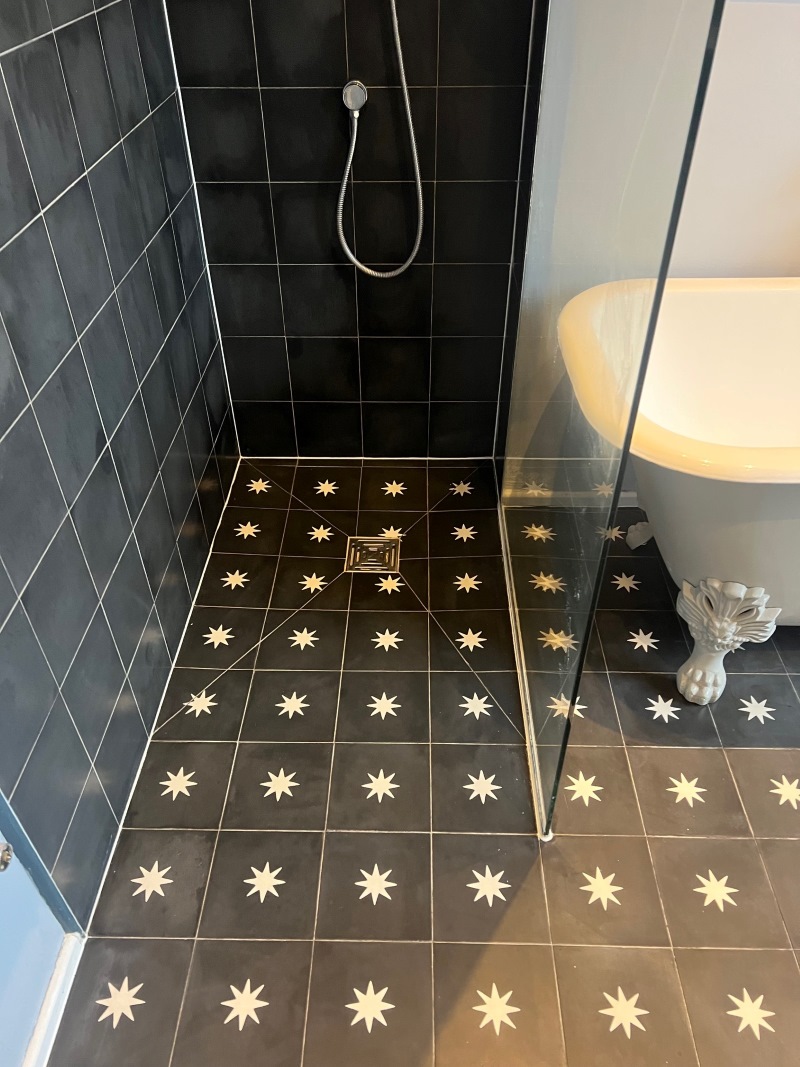
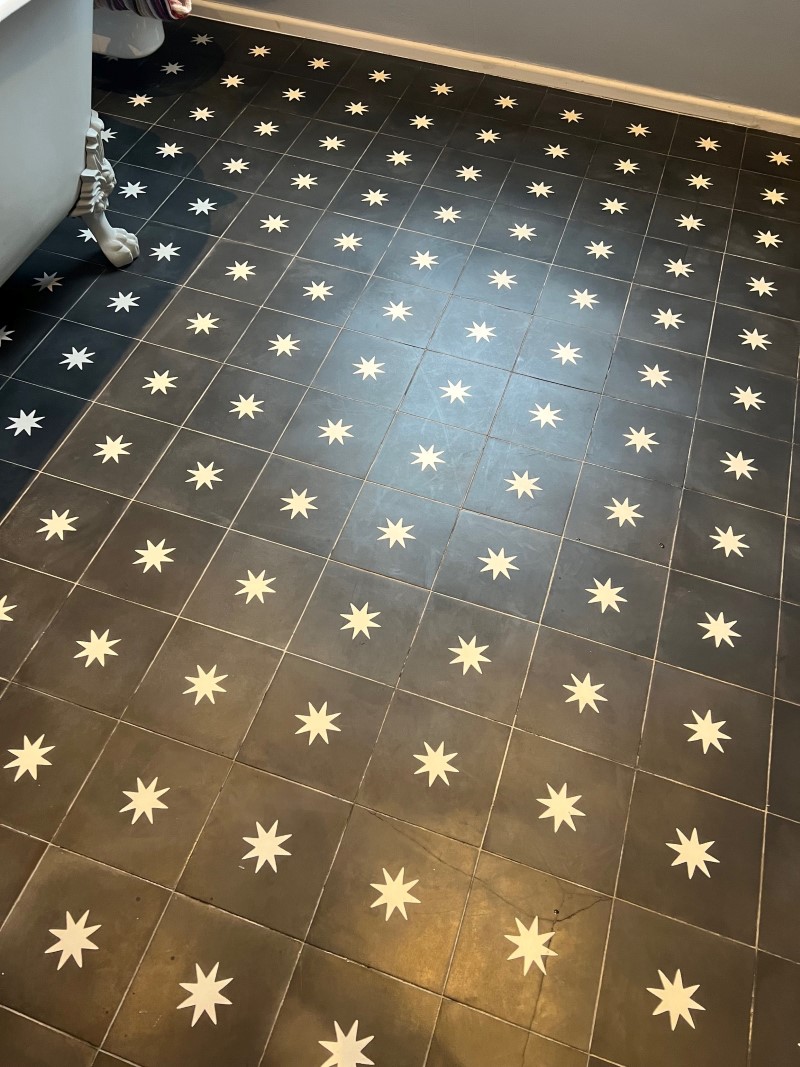
Encaustic Bathroom Tiles After Cleaning Whitechapel

The job went very well, and my client was very pleased with the difference, so much so they left the following feedback:

“Walter is an absolute professional. He has made my 10-year-old cement tiles look brand new. To be honest I never believed they could be so transformed as they had calcified over the years from hard water. He is also an absolute delight and reliable and trustworthy to have in your home. It took me some time to book him as he is very sought after, but persistence proved to be the right move. “

Before leaving we discussed on-going cleaning, and I re-iterated the need to avoid using strong cleaning products on sealed tiles. I also suggested mopping up any pools where water was collecting and using a Tile Doctor Aqua Pro for daily cleaning.
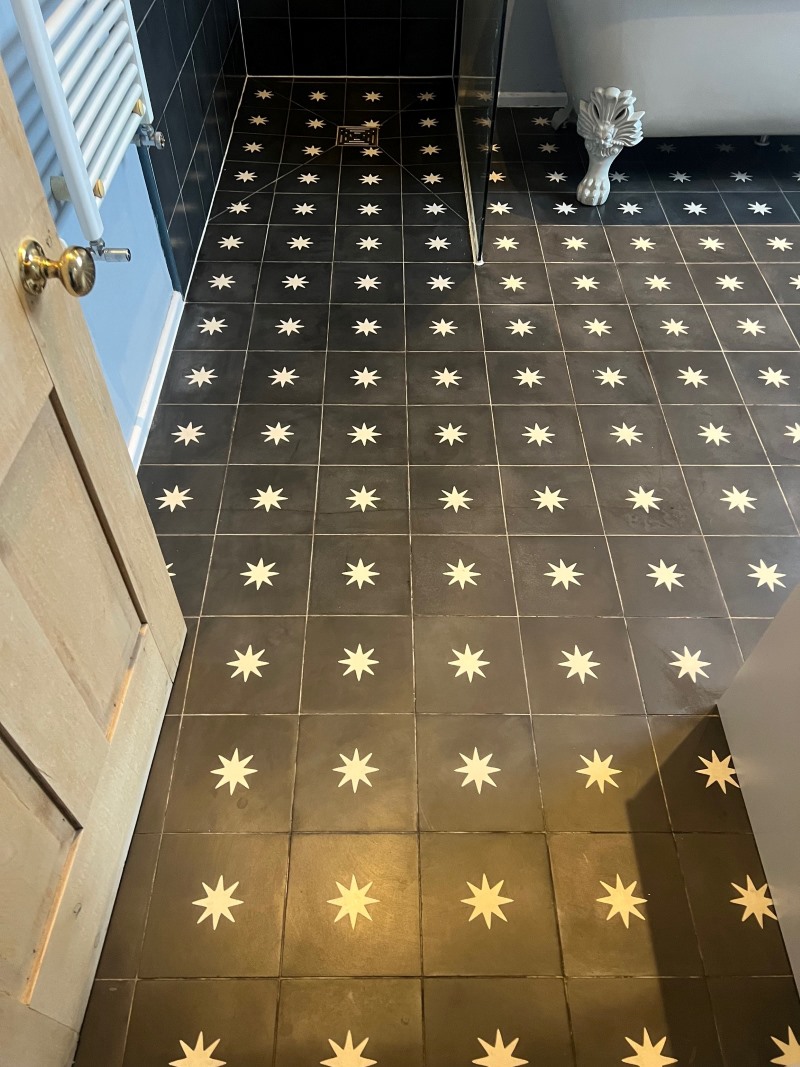
Encaustic Bathroom Tiles After Cleaning Whitechapel Encaustic Bathroom Tiles After Cleaning Whitechapel


Professional Restoration of an Encaustic Tiled Bathroom in East London

Encaustic Cement Shower Tiles Renovation in a Whitechapel Bathroom Read More »

Bathroom Ceramic Tile Grout Before After Cleaning Bow

Cleaning Ceramic Bathroom Shower Tile and Grout in Bow

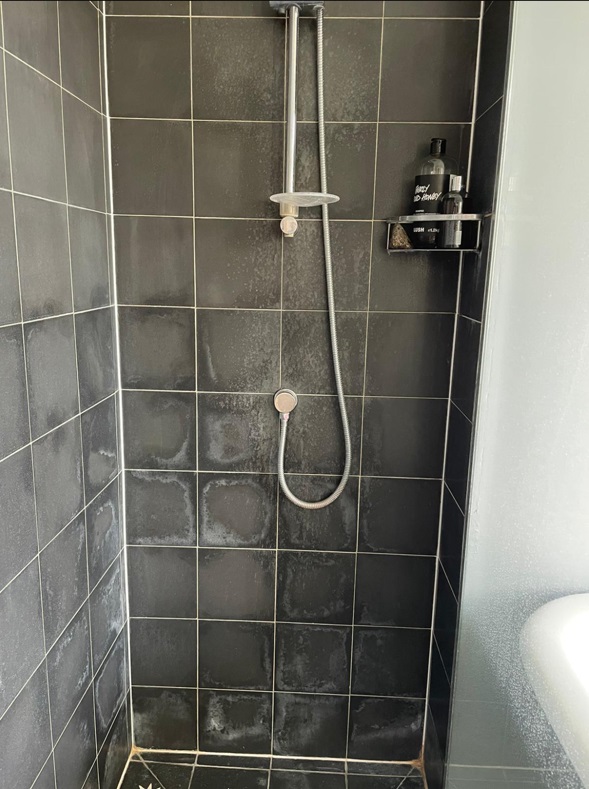
I was called to this property in Bow East London, because the grout around the shower had become dirty and had gone a yellowy/orange colour over time. This is quite a common problem with shower tiles due to the dyes you find in most shampoo and shower gel products. There was also some mould that needed removing. The ceramic tiles themselves were glazed ceramic which are very easy to clean but as usual the grout was bringing the appearance of the bathroom down.

Ceramic Tiled Shower Bath Tiles Before Cleaning Bow

The client was keen to see if the grout could be restored and had considered removing the grout and replacing it, but this takes time and I felt it would not be necessary. There are a number of Tile Doctor grout cleaning products I could have used to remedy these issues. I discussed the options with the client, and we agreed a price to complete the work.
Given the appearance of mould I decided to go with Tile Doctor Duo Clean which is designed for cleaning bathroom tiles and grout.

Bow is an area in the London Borough of Tower Hamlets in East End of London. It is mostly a residential area which is around 5 miles east of Charing Cross. It became part of the County of London following the passing of the Local Government Act 1888. “Bow” is an abbreviation of the medieval name Stratford-at-Bow, in which “Bow” refers to the bowed bridge built here in the early 12th century.

Cleaning a Ceramic Tiled Shower

Working in small sections from top to bottom the method I used to renovate the tile and grout was to spray the tiles and especially the grout with Tile Doctor Duo Clean. This product is designed for bathroom tile cleaning and comes with a spray head attachment, so it is ready to use. I then left the product to soak in for about ten minutes before scrubbing it in with a brush and then rinsed it off with water. It is always easier to clean tiles in this situation as the water can just drain away. In other areas we would need to use the wet vacuum to remove the soiled waste.

After repeating this process for the whole of the shower wall I then retreated any areas which needed more work until I was happy all the staining and mould was gone.

Sealing a Ceramic Tiled Shower Cubicle

The area was then dried and the only job remaining was the seal the grout which will prevent the grout staining going forward. To do this I spayed on Tile Doctor Wall Grout Sealer which comes in an aerosol and is very easy to apply.

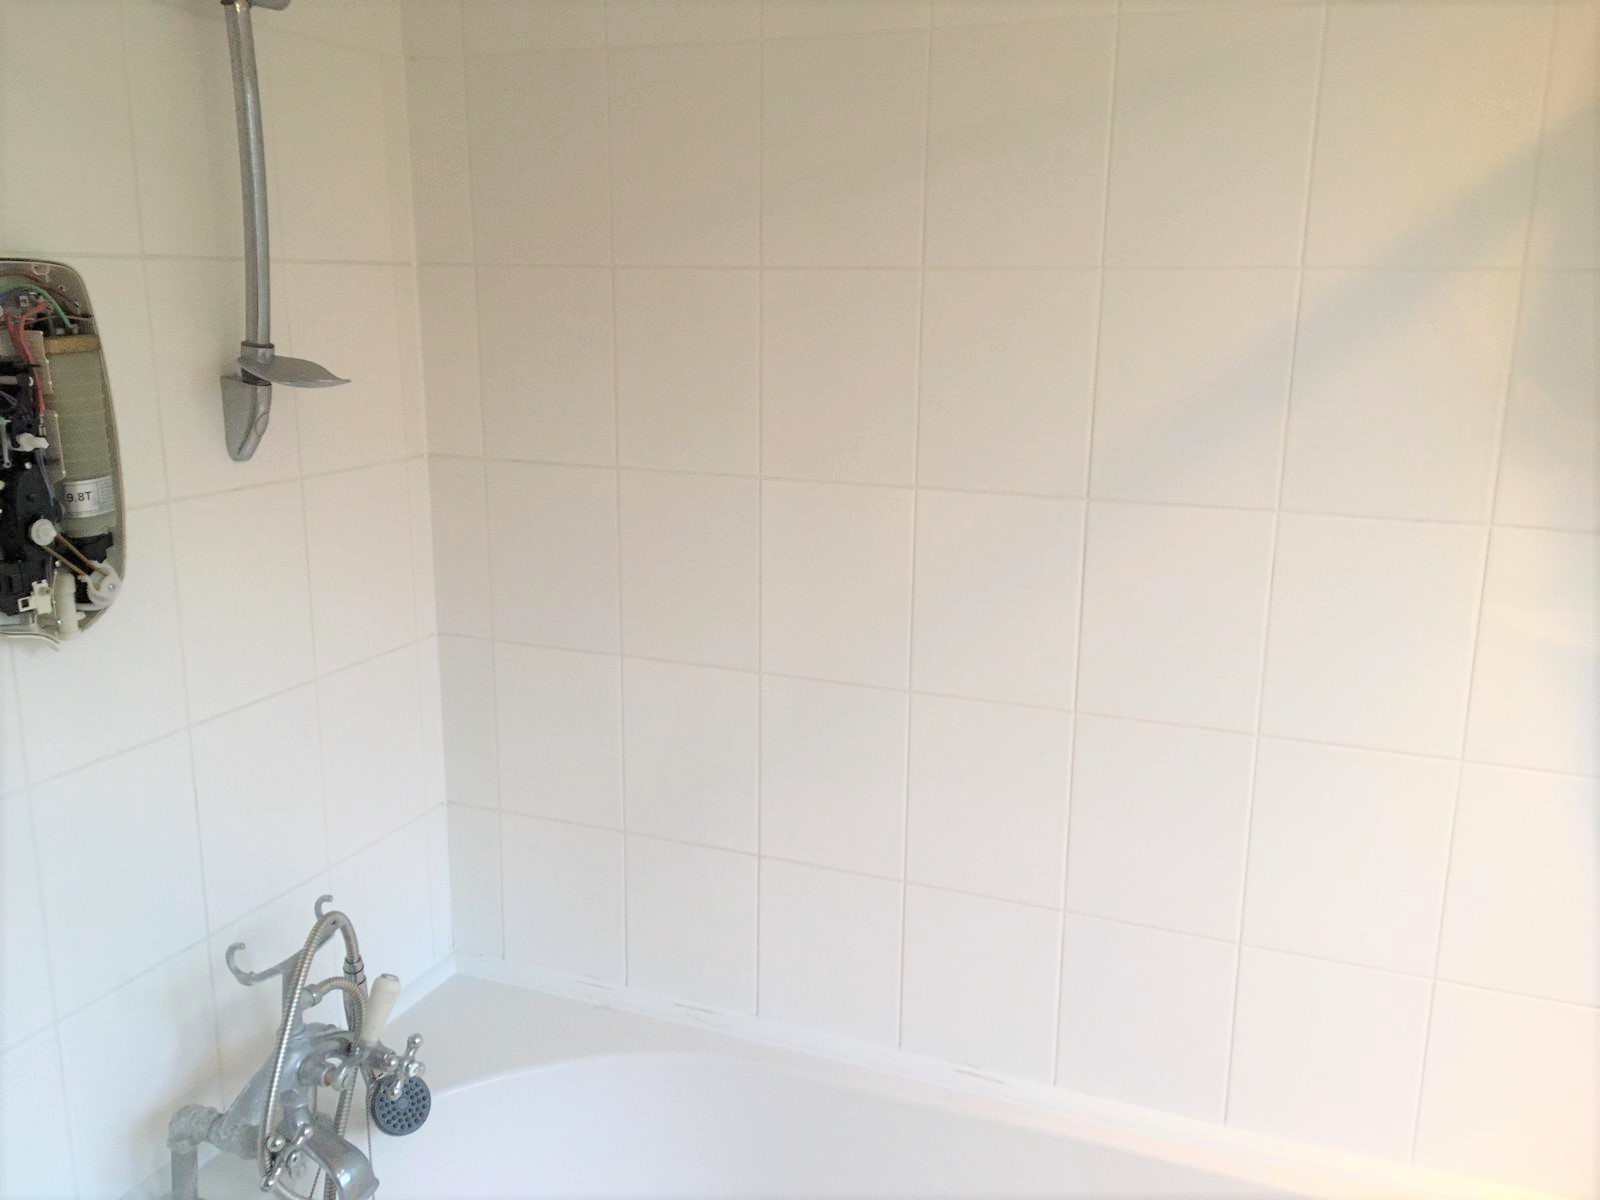
Ceramic Tiled Shower Bath Tiles After Cleaning Bow

The client was very happy with the work, the bathroom was restored and looked much more appealing.


Professional Clean of a Ceramic Tiled Bathroom in East London

Cleaning Ceramic Bathroom Shower Tile and Grout in Bow Read More »

Travertine Tiled Floor Before After Refurb Mile End

Renovation of Travertine Floor in Mile End Rental Property

We recently renovated a Travertine tiled floor in the Kitchen of a rental property in Mile End, which is part of the Tower Hamlets borough of East London. My client was the Landlord and unfortunately the previous tenants had not maintained the Travertine floor very well. The grout was filthy, and the tiles were ingrained with dirt and had lost their shine which made for a very unattractive floor that was likely to put off a potential new tenant.

Dirty Travertine Floor Before Renovation Mile End East London

The stone floor was an expensive addition for my client who was concerned about the state of the tiles and of course worried that it would be difficult to find a new tenant with the floor in that condition. Naturally she wanted to have the Travertine tiles renovated as soon as possible so she could get it back on the market.

To keep a stone floor in good condition it’s important to maintain the sealer as once it degrades dirt becomes ingrained in the pores and it becomes difficult to keep clean. I was confident the floor could be restored and having agreed my quote I was able to complete the work the same week.

Cleaning a Travertine Tiled Kitchen Floor

I went over to the property and immediately set about deep cleaning and rebuilding the polish on the Travertine tiles using a set of diamond encrusted burnishing pads. I started with a 400-grit pad, followed by the 800-grit and then the 1500-grit. Each pad was applied to the tiles with water to lubricate the process rinsing and extracting the soil after each pad.

Next, I turned my attention to the dirty grout lines which I treated with a strong solution of Tile Doctor Pro-Clean which was left to dwell on the grout lines for a few minutes before being scrubbed in by hand. This was then rinsed off with water and again extracted with a wet vacuum.

Normally I would take two days to work on a floor like this, one day to clean and one day to seal however it wasn’t a large floor so I used a number of high powered fans to force dry the floor so I would be able to apply the sealer later that day.

Sealing a Travertine Tiled Kitchen Floor

Once the floor was dry, I then spray burnished the floor with a 3000-grit pad which further brought up the polished appearance of the Travertine, the last burnishing pad is applied dry with only a little water which is sprayed onto the floor as you polish.

After testing the floor for moisture using the moisture meter, I was happy it was dry, so I proceeded to apply two coats of Tile Doctor Colour Grow sealer. Tile Doctor Colour Grow is is a penetrating colour intensifying sealer that enhances the natural brown and cream colours in the Travertine whilst providing durable protection. Once the sealer had dried the floor looked great and had once again become a real asset to the property.

Dirty Travertine Floor After Renovation Mile End East London

It was dark outside by the time I had finished so apologies for the after photo, however I think you will agree the floor looks much healthier. Certainly, my customer was delighted to have the floor back to its former glory and with the floor looking like new it should achieve a good rent.


Professional Restoration of a Travertine Tiled Kitchen Floor in East London Rental

Renovation of Travertine Floor in Mile End Rental Property Read More »

=================================

East London Tile Doctor

================================= Read More »

Scroll to Top