Work History

East-London-Tile-Doctor

Welcome to my Work History archive where you will find detailed examples of Tile, Grout and Stone Cleaning and renovation work carried out within East London.

Victorian Path Renovated in Hackney East London

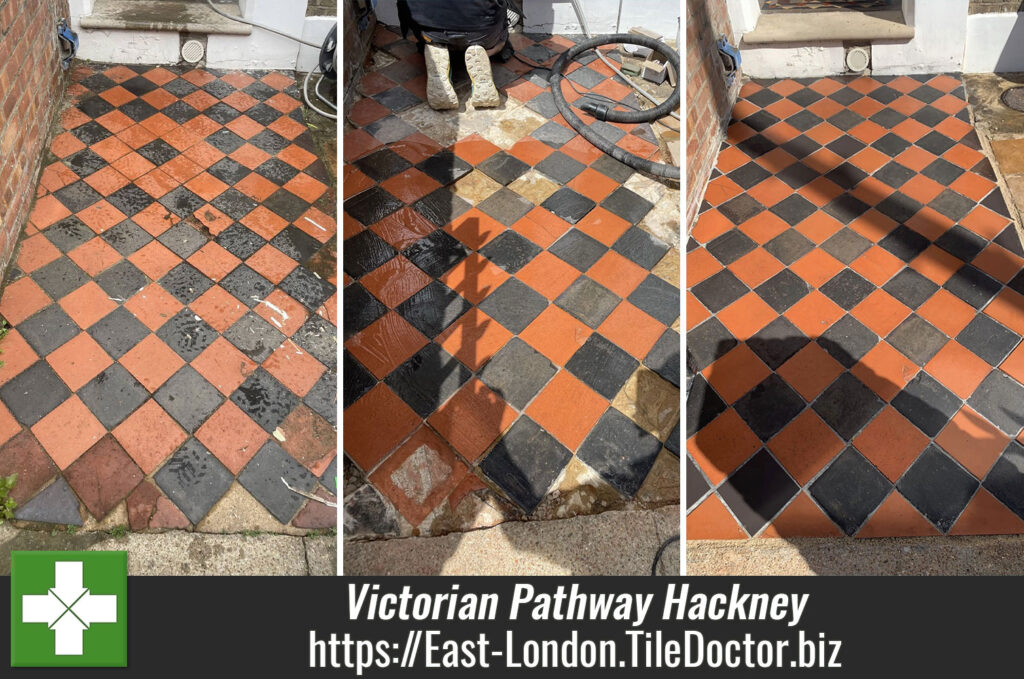
Red and Black Victorian Tiled Pathway Restored in Hackney East London

The picture below is of a Red and Black Victorian Path leading up to a house in Hackney; which according to my client had never been maintained since they moved in and that was 31 years ago.

The years had taken their toll on the tiles and the path had numerous problems including missing and damaged tiles, grout was missing or had fallen out, the colours in the tiles had faded, weeds were growing through and at some point in its long history a repair had been made which had messed up the pattern.

Victorian Pathway Before Restoration Hackney East London

It always makes a pleasant change to be asked to carry out work outside especially given then hot temperatures we have experienced in the Southeast recently; however, you do have pick the right weather window. I inspected the path and discussed with the client the process needed to renovate it. They were happy to go ahead with my quote and we arranged a time to return later in the month keeping one eye on the weather as a nice dry day would be needed.

Repairing a Black and Red Victorian Tiled Path

Being outdoors, for a change we didn’t need to tape any surrounding areas to protect them from the clean, so we were able to get straight on with repairing the path. This started by carefully lifting out the damaged tiles and the cement which had been used to backfill the places where tiles were missing. At this point I could see 15 tiles would need replacing in total.

I also dug out the channel between the adjacent Sandstone patio and the Victorian pathway so it could be tidied up. The foundation was cleaned up and I was ready to lay out the replacement tiles in a matching pattern to ensure a good fit and that they would be level with the surrounding tiles. I also sorted out the pattern making it an even, symmetrical design throughout the path.

Victorian Pathway During Restoration Hackney East London

Once I knew everything would fit, the tiles were all set in position used a slow setting adhesive that would allow for a few corrections as it went off. Before leaving for the day, I grout in the tiles using a smoke grey grout colour and left instructions for no one to walk on the path.

By the end of the first day the path was looking much healthier.

Deep Cleaning a Black and Red Victorian Tiled Path

The second day was all about cleaning and with the adhesive set I was able to give the whole path a mechanical scrub with a coarse 50-grit Diamond pad lubricated with a dilution of Tile Doctor Pro-Clean with is a strong alkaline cleaner. This combination really gets into the pores of the tile to lift out the ingrained with dirt. The soiled cleaning solution was the vacuumed away with a wet vax and the process repeated with a 100 and then a 200-grit diamond grit pad but with just water this time. The finer pads refine the finish of the tile after the application of the coarse 50-grit pad. After another rinse and extraction, the floor was inspected and worked on the really bad tiles using a set of diamond blocks to get right into the dirt.

Last step in the cleaning process was to give the tiles an acid rinse using a strong dilution of Tile Doctor Grout Clean-up which does a number of things including neutralising the ph level of the tile, countering any efflorescent salts in the floor and cleaning off grout smears.

My final step for the day was to fill in the channel between the Sandstone patio and the pathway with some an Easy Joint compound in a mushroom colour.

Sealing a Victorian Tiled Pathway

The dry weather continued so I was able to return the following day to seal the tiles and protect them from the weather. The tiles need to be dry before being sealed so their moisture readings were taken with a damp meter. The meter showed little to no moisture which was perfect. The weather helped massively in this process although it was a little too hot for me sometimes!

I used Tile Doctor X-Tra Seal to seal the floor, it’s an oil-based sealer that enhances colour and structure in the tile to bring out the Red and Black colour, its fully breathable and has built-in UV protection. Due to being outside and exposed to the sun this was clearly the best sealer for the job. I put 1 coat on, buffed off the excess and then left it for half an hour before putting another coat on.

Victorian Pathway After Restoration Hackney East London

The path looked new by the time I had finished, and I had a very happy customer who has now asked me to quote for a clean of their back garden patio.


Professional Restoration of a Victorian Tiled Pathway in East London

Red and Black Victorian Tiled Pathway Restored in Hackney East London Read More »

Travertine Patio Renovation Hackney E5

Renovating a Travertine Patio in Hackney

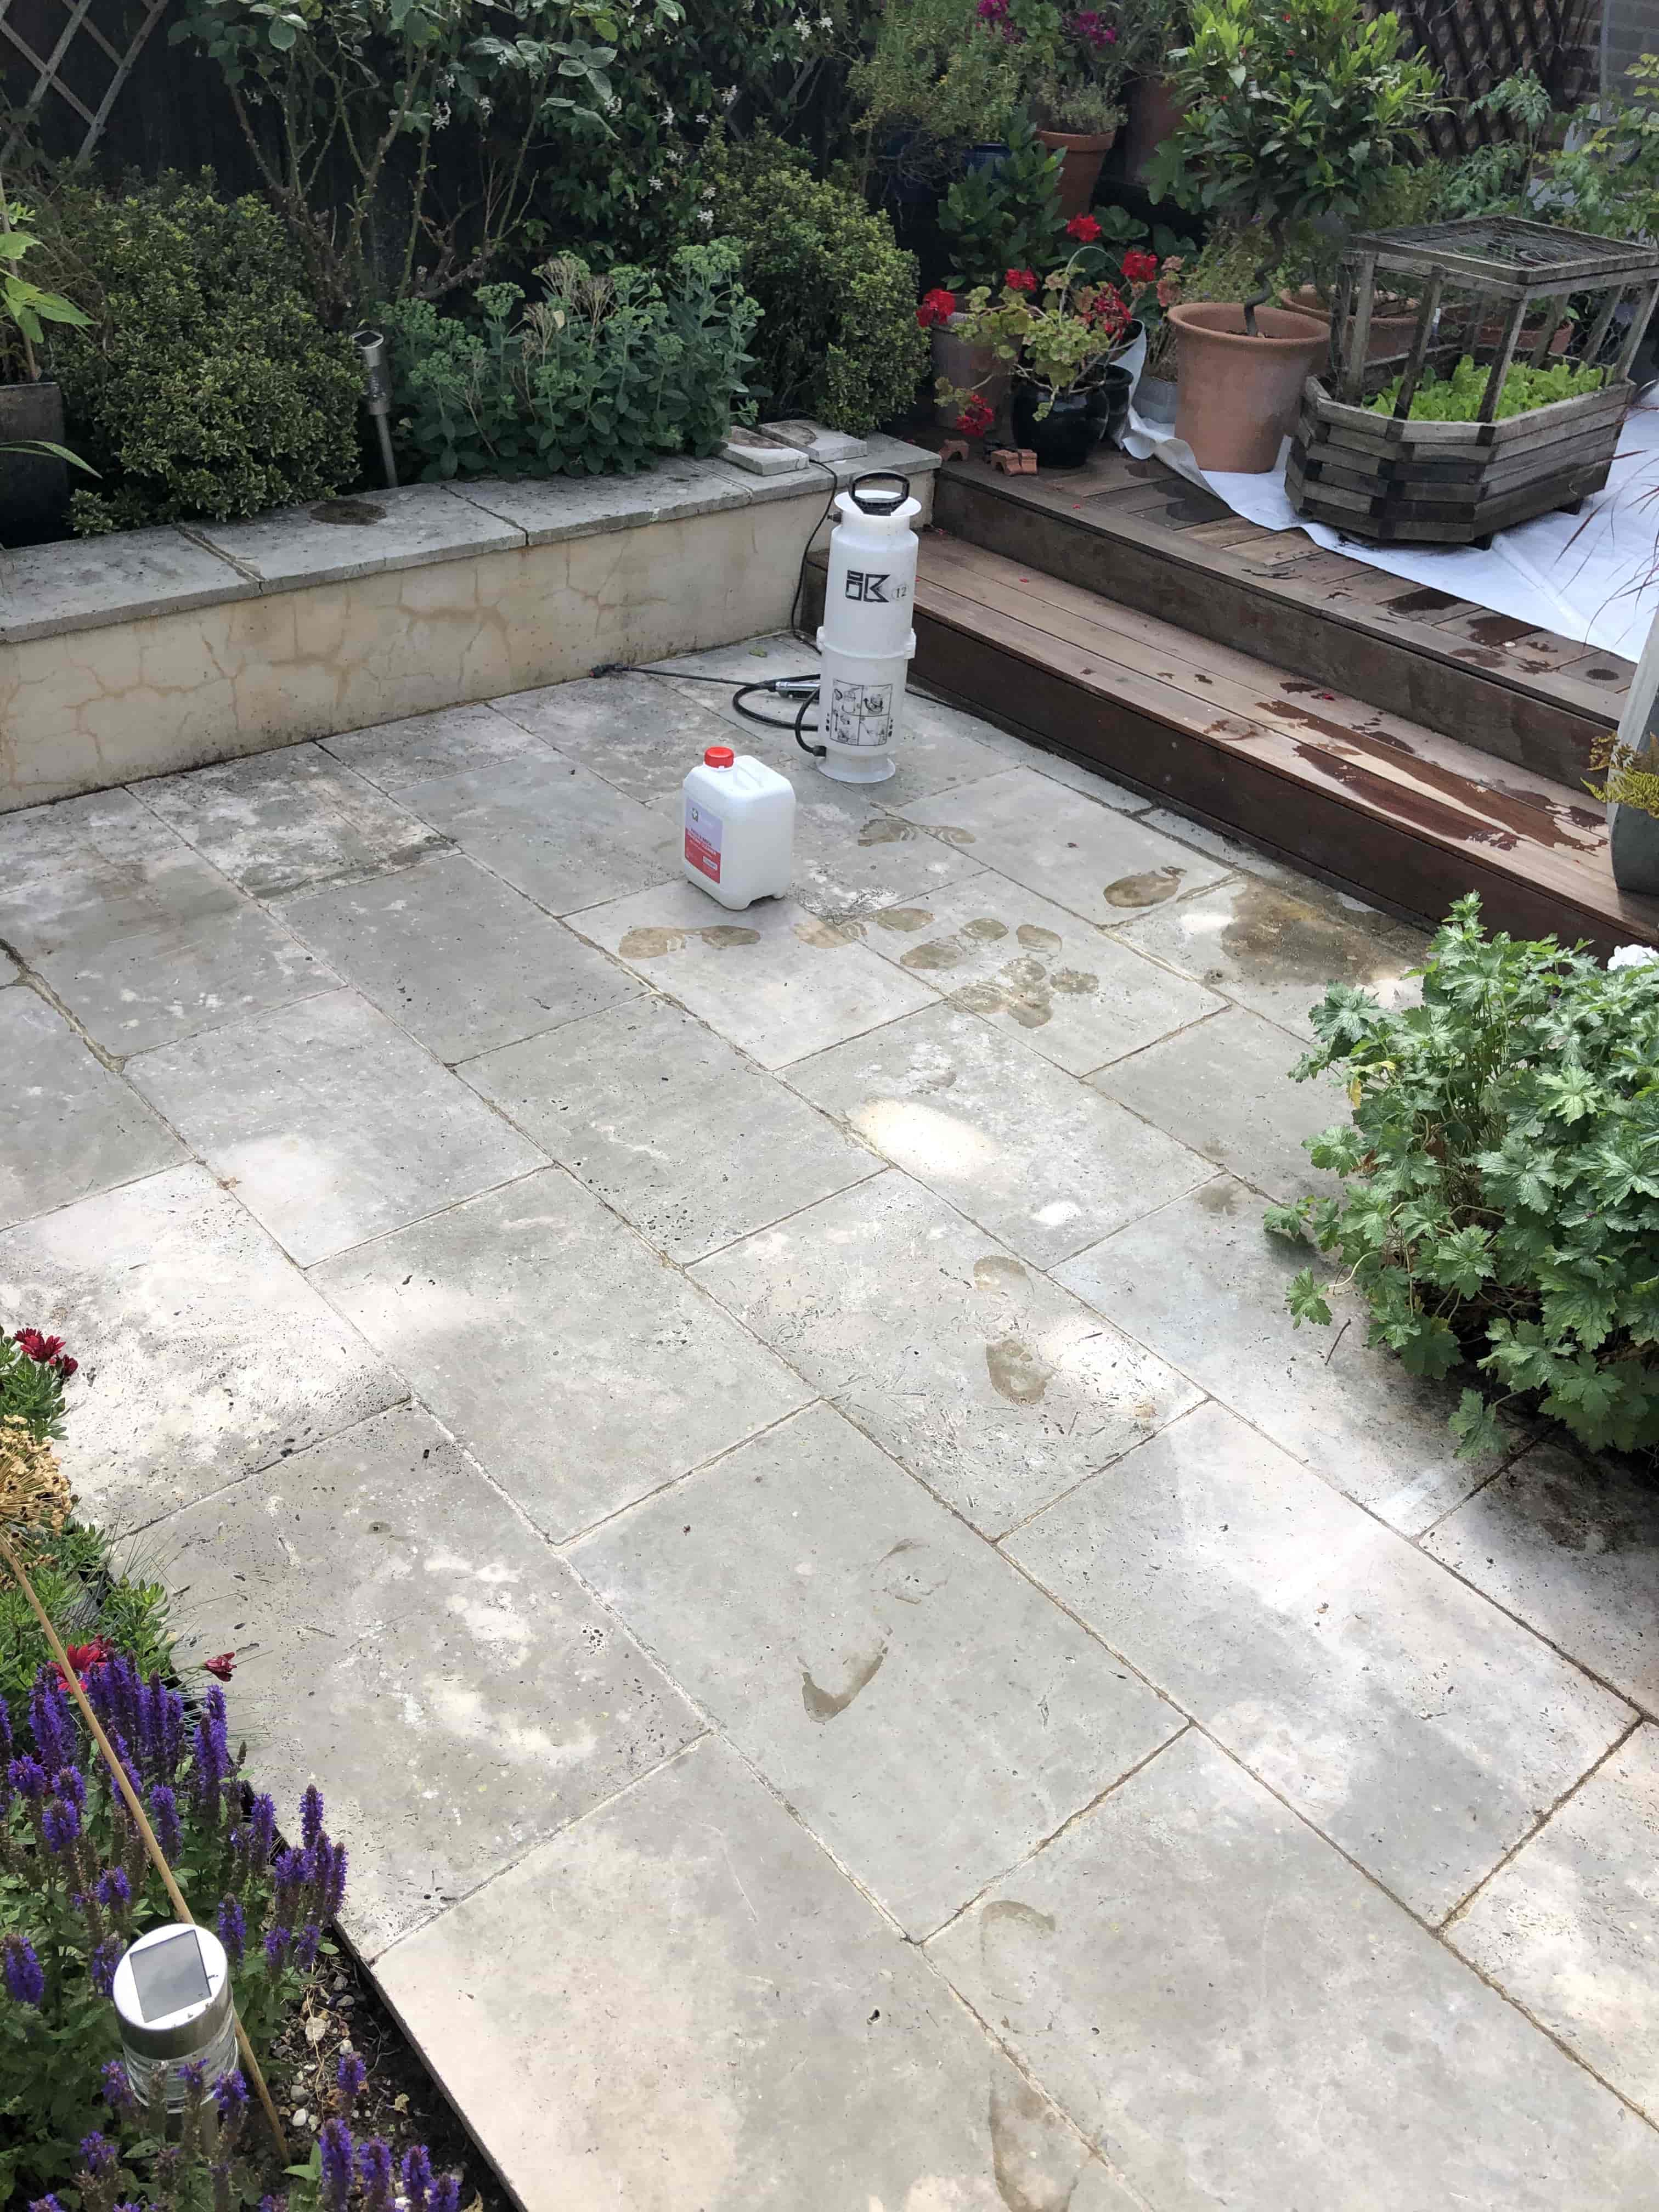
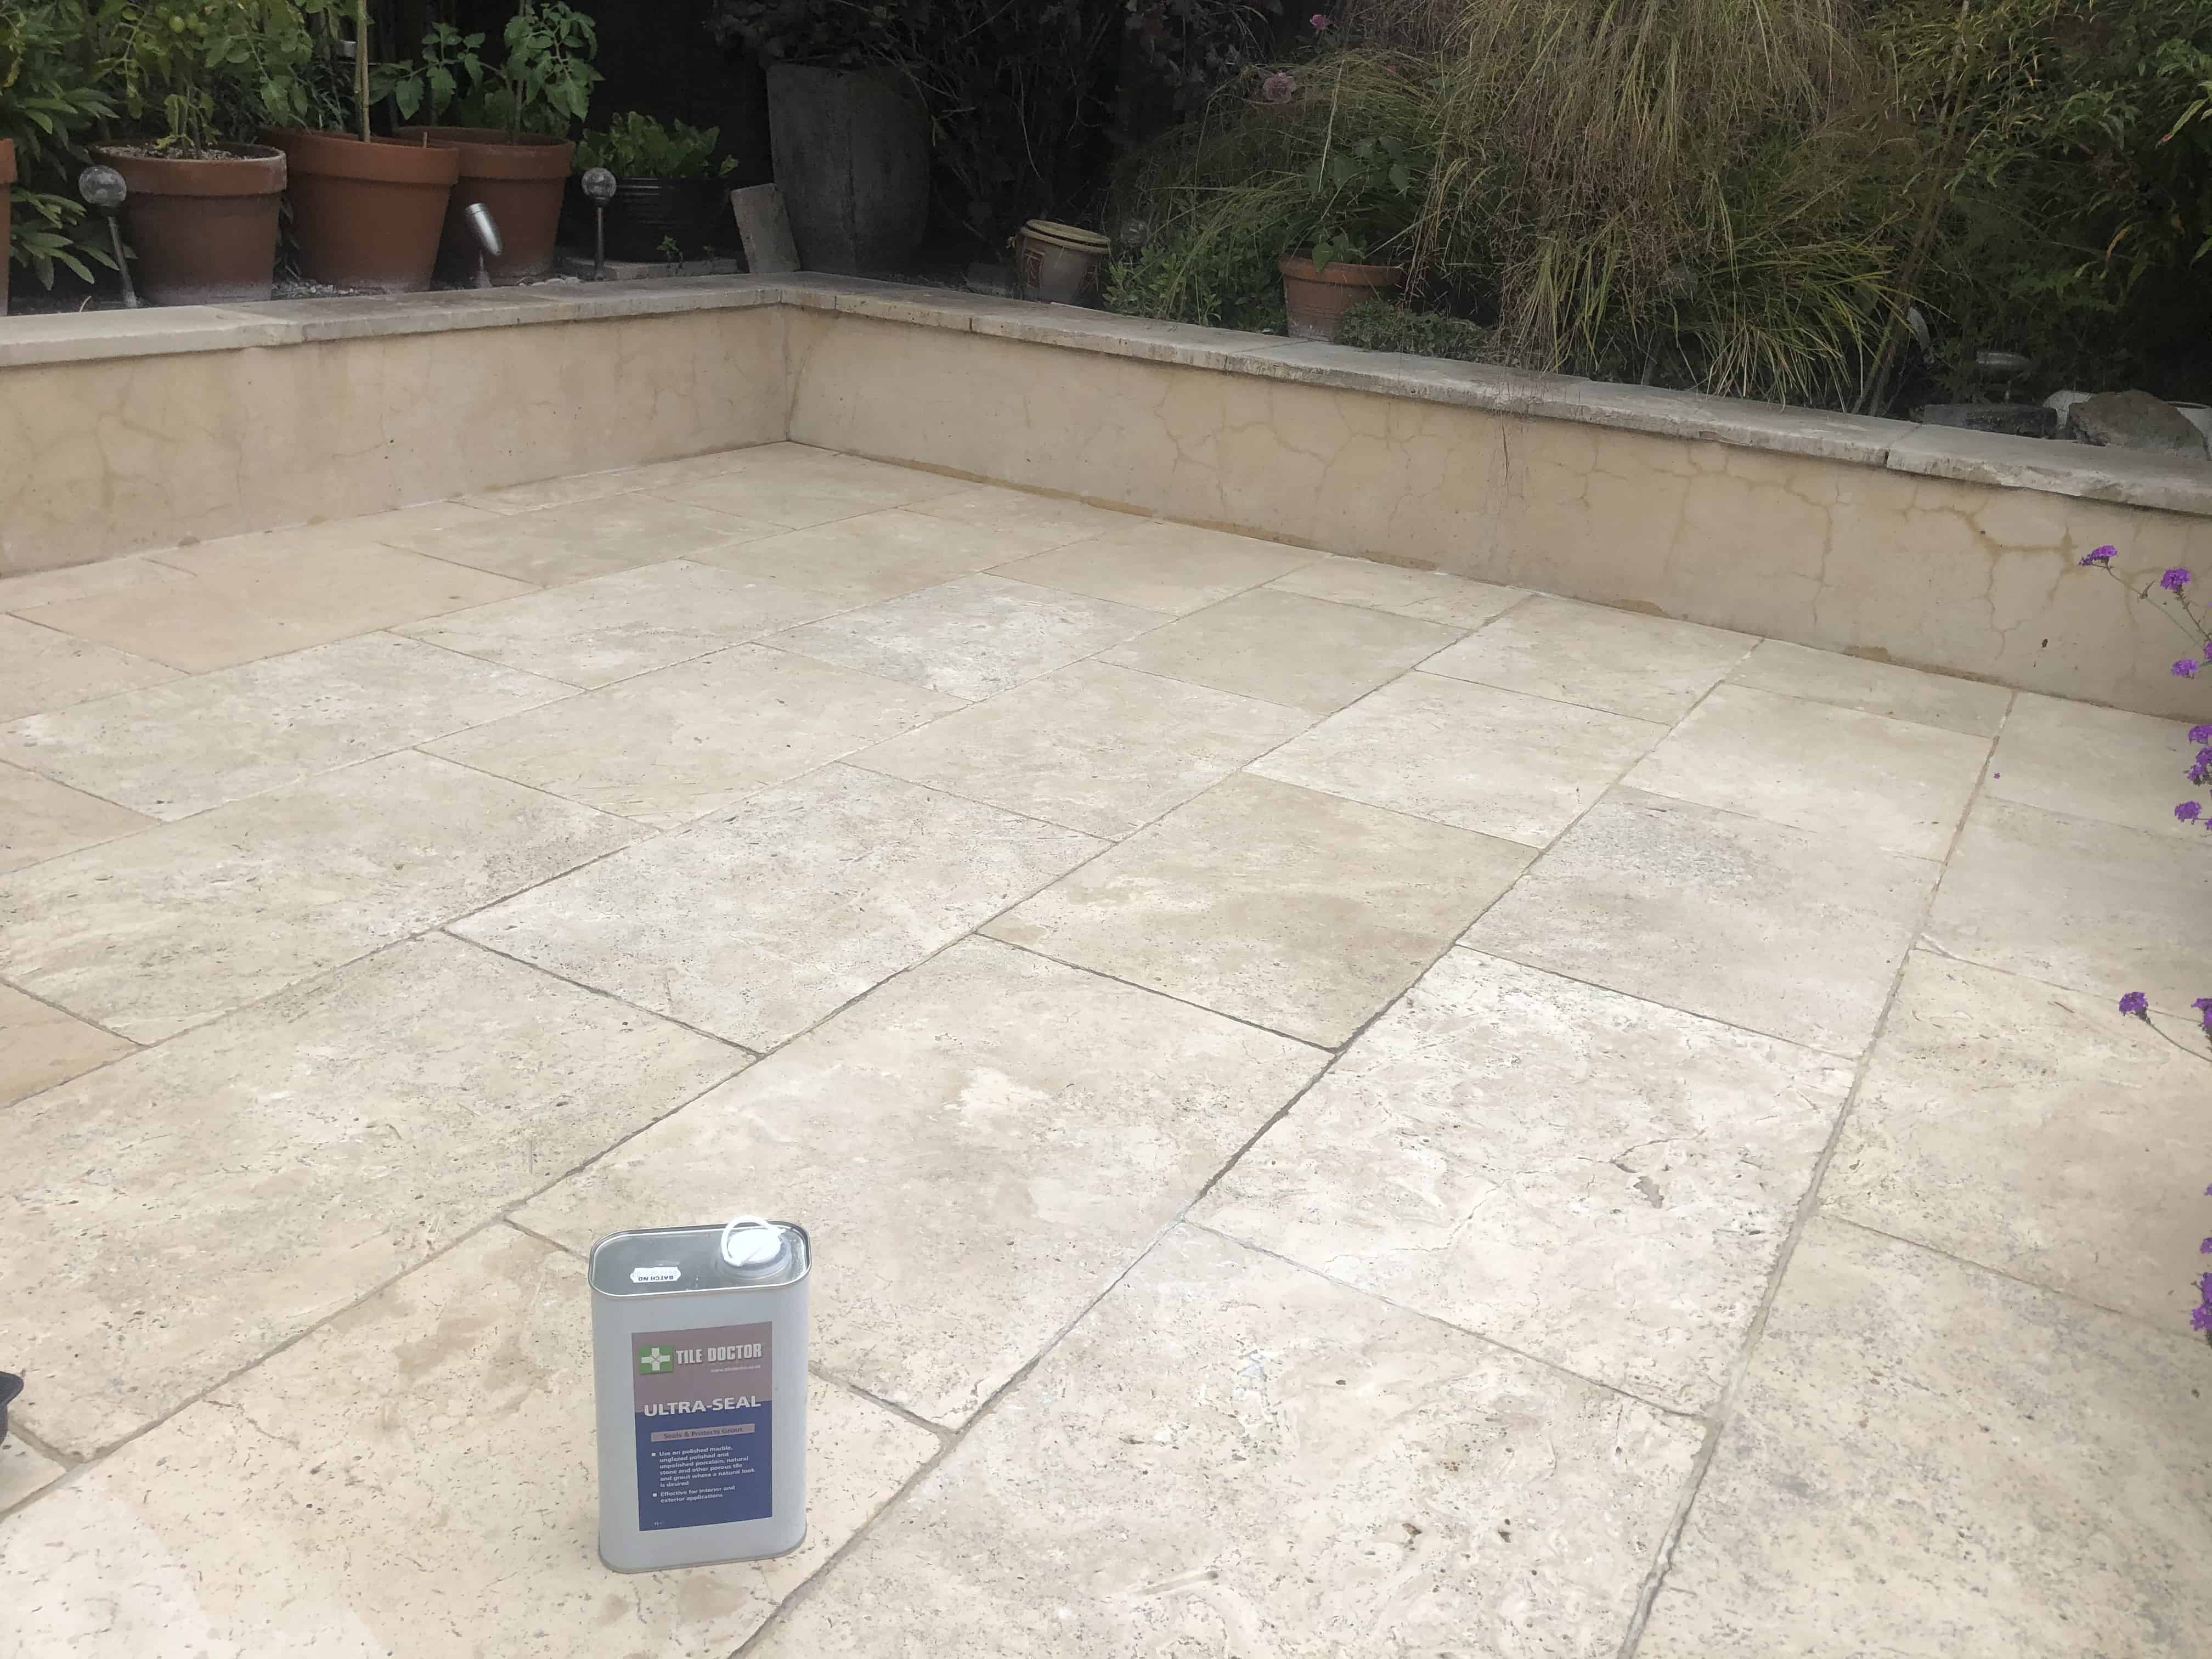
The picture shows an Travertine patio that was installed at a property in Hackney E5 around ten years ago and it had never been sealed. Over the year’s pollution and weather etc had taken its toll on the stone leaving the travertine stained with lichen, dull and grey as opposed to their original white/cream colour. Had the patio been sealed it would have provided some protection from the elements.

Travertine Patio Before Renovation Hackney E5

I conducted an initial visit where I tested several products to see what would be the most effective and establish what was required. Using that knowledge, I followed up with a written quote which was accepted, and a date arranged to complete the work.

We have adopted new working practices since the COVID-19 epidemic so we can work safely inside or outside but given the excellent weather this year this was an ideal and much easier to maintain social distancing.

Cleaning a Travertine Tiled Patio Floor

During day 1 on site I started by sweeping away loose stones and other debris you typically find on patios. Then Tile Doctor Patio and Brick Driveway cleaner was applied neat to the stone and left for two hours. This is a very strong product designed for use by professionals which cuts through the dirt and was ideal for this situation. There are certain precautions you do need to take when using it such as wearing PPE and you must keep it away from ponds etc.

Using water to lubricate, the solution was then scrubbed into the stone using a coarse 200-grit pad fitted to a rotary machine and followed up with a lot of rinsing and extracting with water and a wet vacuum.

To refine the surface after the coarse Travertine the 200-grit pad I followed with 400, 800 and then 1500-grit burnishing pads in sequence rinsing with water and extracting after each pad was applied. This process is known as burnishing and closes the pores in the stone giving it a polished appearance. By this point the Travertine looked way better and we were starting to get the smooth finish back.

Travertine Patio During Cleaning Hackney E5

The weather held so the following morning a 3000-grit polishing pad was applied dry to the stone using only a little water. This brings up the appearance of the stone even further and has the added advantage of leaving it dry and ready for sealing.

Sealing a Travertine Tiled Patio Floor

The client wanted a natural appearance so two coats of Tile Doctor Ultra Seal were applied to seal the stone. Ultra-Seal is an impregnating sealer that soaks into the stone, protecting it from within yet without changing the appearance of the stone leaving a completely natural look.

Travertine Patio During Sealing Hackney E5

The client very happy with job and now proud so show off her revamped patio. They hadn’t realised that the patio should have looked like this from the start. For aftercare I recommended they use Tile Doctor Stone Soap, many day to day cleaning products you find in supermarkets can strip off a sealer so if your using something else do check the label first.

Travertine Patio After Renovation Hackney E5


Professional Restoration of a Travertine Tiled Patio in East London

Renovating a Travertine Patio in Hackney Read More »

Balcony Tiled with Encaustic Cement Tiles in Hackney

Tiling a Balcony Floor in Hackney with Encaustic Cement tiles

This client from Hackney had started a DIY tiling job using modern Encaustic Cement tiles on an external balcony. The COVID-19 lockdown had just taken effect and it seemed like a great opportunity to get a few DIY projects done. Although it started off well, she began to struggle when having to cut the edging tiles and corners so was forced to leave the tiling incomplete and un-grouted. Furthermore, she had attempted to seal the tiles, but this had somehow caused the tiles to go milky white. Encaustic tiles date back to medieval times and have been popular in the UK since the nineteenth century and have become extremely popular here in the last few years.

Encaustic Cement Balcony Tiling Project in Hackney Before

Concerned the whole project would need ripping up and starting again she contact Tile Doctor and I arranged a visit to the property to assess the tiling and see if the project it could be rescued. Since the COVID-19 epidemic began we have adopted new working practices such as more PPE and Social Distancing to allow us to continue working.

Encaustic Cement Balcony Tiling Project in Hackney Before

We test cleaned the sealer and found the application of a 400-grit diamond pad was the best way to clean off the sealer and renovate the tile. Additionally, we had been asked to complete the tiling project which was approx. 24m2. The job would therefore entail tiling, cleaning, and sealing so it took a little while to calculate the quote which was accepted.

Cleaning/Repairing an Encaustic Cement Tiled Balcony

There was a lot of work to do and so I teamed up with fellow Tile Doctor Andrew Newstead for this job working as a two-man team. It took three days to complete the tiling and the grouting, then we returned the following week to allow the adhesive and grout to fully dry over the weekend.

The next step was to clean the area the customer had previously laid and sealed to remove the old sealer that had damaged the colour and look of the tiles. For this we used water and a series of 400, 800 and 1500-grit diamond pads. This gradually removed the sealer and brought the tiles back to a more natural finish. We suspect the reason her tiles went milky was she hadn’t buffed off the excess sealer but luckily, we were able to fix it.

Sealing an Encaustic Cement Tiled Balcony

We then returned for one more morning, buffed tiles with a 3000-grit pad to further enhance their appearance and then seal with two coats of Tile Doctor Colour Grow. Colour Grow is an impregnating sealer that improves colour and works by soaking into the pores of the tile preventing dirt from becoming ingrained there.

Encaustic Cement Balcony Tiling Project in Hackney After Encaustic Cement Balcony Tiling Project in Hackney After

I’m pleased to say the whole job went smoothly and our client was pleased (see feedback below) that they could finally use their balcony which I’m sure has been in constant use since.

Plenty of problems to solve with my half-finished roof terrace, which were solved cheerfully and carefully. By Gemma M, Hackney, 27 May 2020


Encaustic Cement Balcony Tiling Project Finished in East London

Tiling a Balcony Floor in Hackney with Encaustic Cement tiles Read More »

Edwardian Floor Covered in Bitumen Before and After Restoration in Leyton E10

Restoration of a Bitumen Stained Edwardian Tiled Hallway in Leyton E10

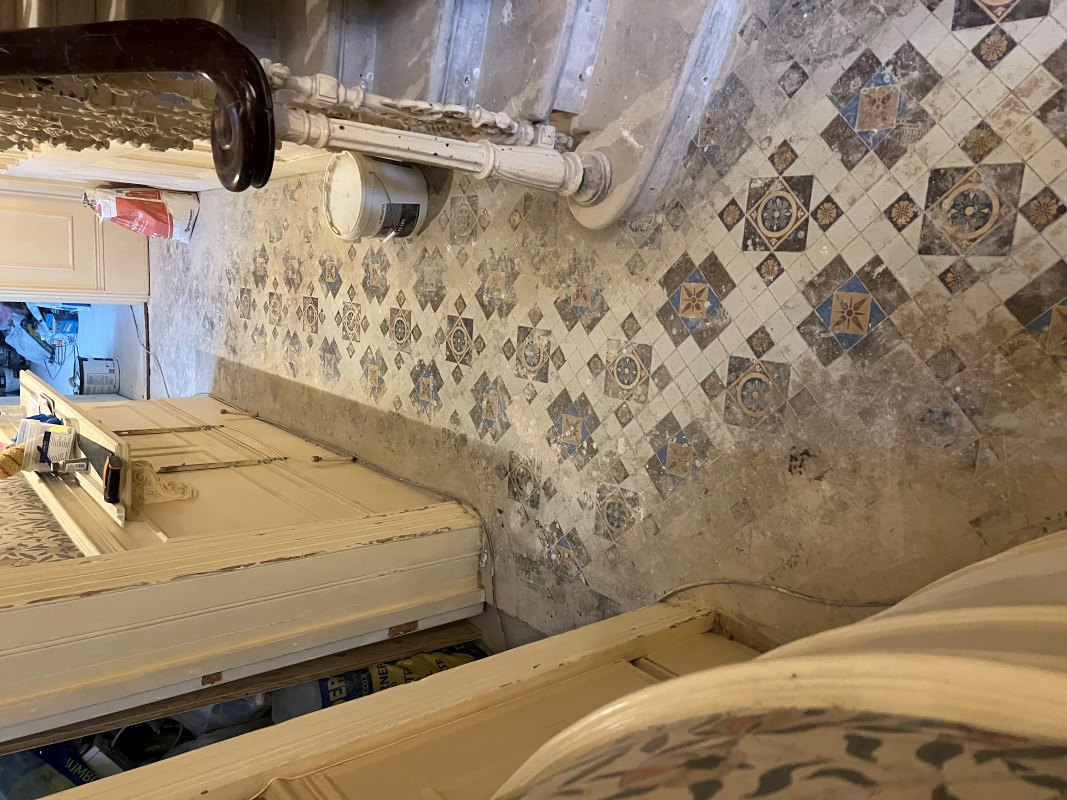
I was contacted by a client who recently bought a house in Leyton E10 and found an original Edwardian floor in the hallway under old lino. The house was built in 1908 making it well over 100 years old and from the Edwardian era.

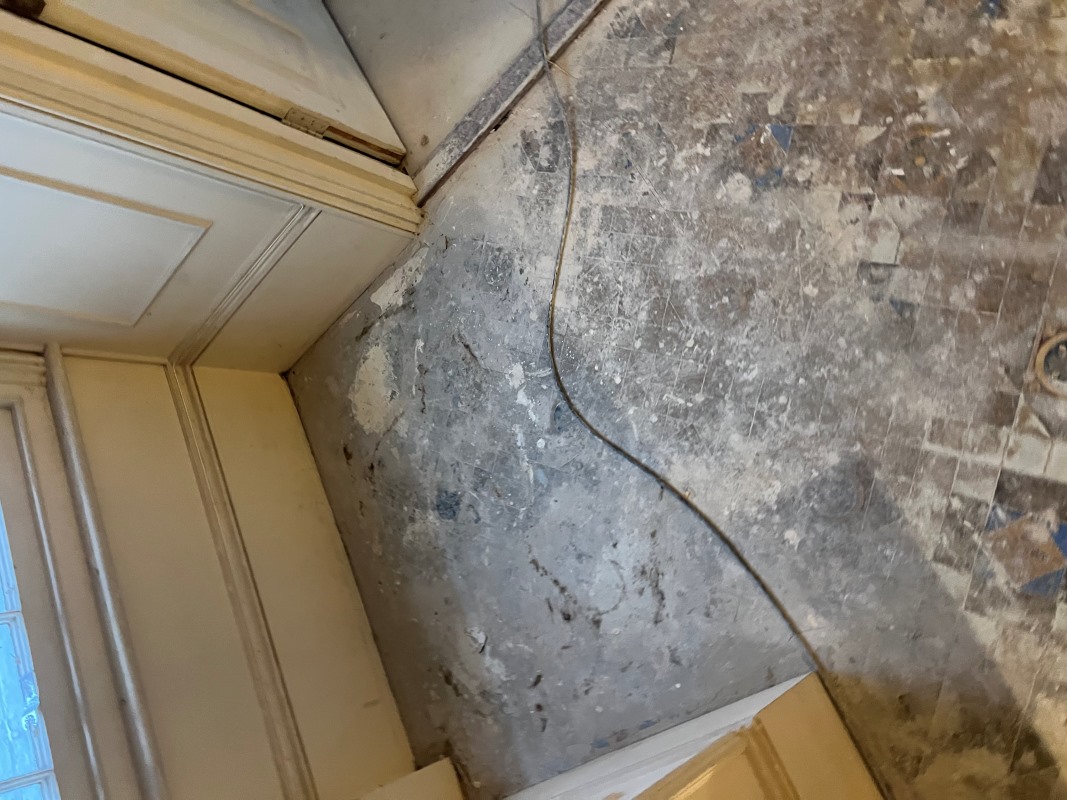
The customer had decided to remove the linoleum, but it had been fixed down with bitumen which he struggled to remove as it is such a sticky substance. As well as the bitumen the floor was dirty with ground in dirt, I can only deduce the previous occupants must have decided just to cover it up with the lino rather than clean it. Also, there was some damage to the tiling in front of the stairs that needed repairing. It was clearly going to be more work and more involved than the new owner had initially thought so I was asked to take over the restoration.

Edwardian Floor Covered in Bitumen Before Restoration in Leyton E10 Edwardian Floor Covered in Bitumen Before Restoration in Leyton E10

After visiting the property for a site visit, I had a good idea of what would be needed and managed to find suitable replacement tiles from Original Style Tiles. They were keen to get the floor restored so they agreed my quote and I went ahead and purchased the replacement tiles on their behalf.

Edwardian Floor Covered in Bitumen Before Restoration in Leyton E10

Removing Bitumen and Repairing an Edwardian Tiled Floor

I used a combination of floor buffers, coarse 200-grit pads, hand scrapers and lots of Tile Doctor Nanotech HBU Remover to get the floor clean and clear of the bitumen. Rather a lot of elbow grease was required too! It was a long process which took up all of day one and continued into much of day two. The day ended by removing the damaged floor tiles and replacing with the newly sourced replacements. The floor was left overnight to dry and the new tile adhesive to cure before we could return to seal the floor.

Edwardian Floor Covered in Bitumen During Restoration in Leyton E10 Edwardian Floor Covered in Bitumen During Restoration in Leyton E10

Sealing an Edwardian Tiled Hallway Floor

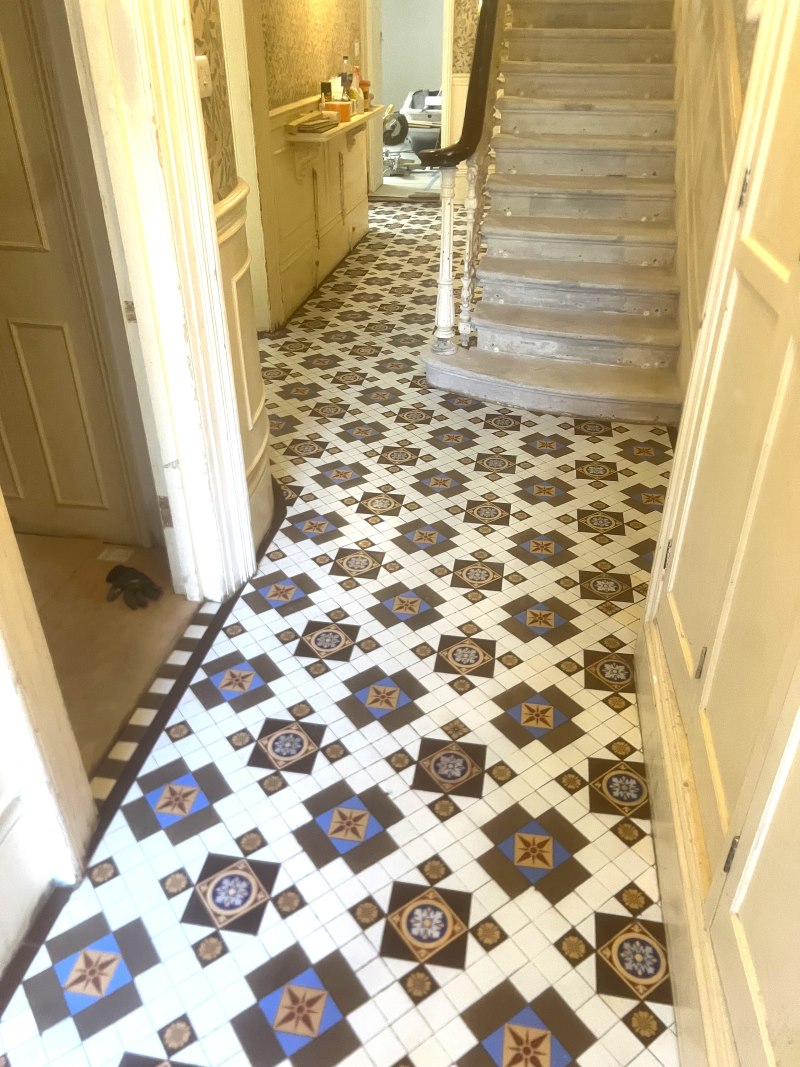
I returned on Day 3 to seal the floor using a couple of coats of Tile Doctor Colour Grow. Old floors like these have no damp proof membrane and being fully breathable Tile Doctor Colour Grow will allow any moisture to rise through the tiles and not get trapped underneath where it could cause problems later. The sealer also gave the floor a nice natural sheen without being too shiny. Most importantly the new sealer would protect the floor going forward which is particularly necessary in a high traffic area such as the hallway.

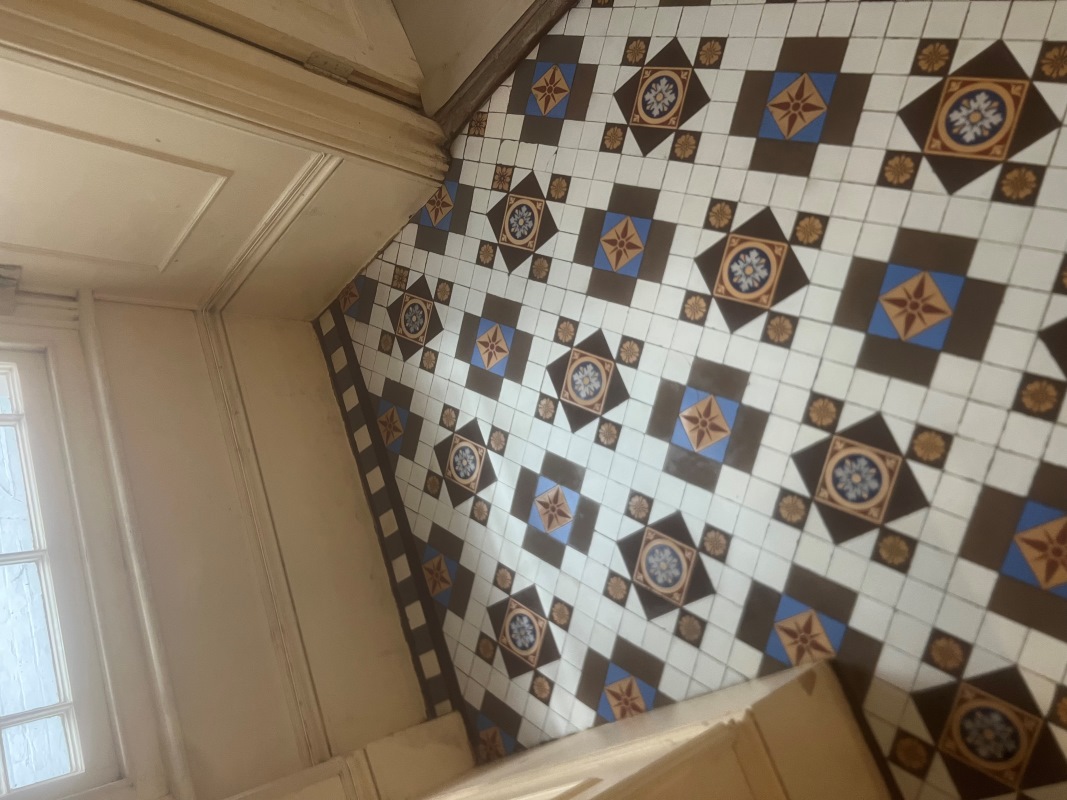
Edwardian Floor Covered in Bitumen After Restoration in Leyton E10 Edwardian Floor Covered in Bitumen After Restoration in Leyton E10

My client was glad to see the floor restored back to its original state which I’m sure will add a lot of value to the property as original features are very sought after these days.

For aftercare I recommend they use Tile Doctor Neutral Tile Cleaner to clean the floor. It’s a pH neutral product so it will ensure that the newly applied seal stays in place and keep the new floor restoration looking good.

Edwardian Floor Covered in Bitumen After Restoration in Leyton E10


Professional Restoration of an Edwardian Tiled Hallway in East London

Restoration of a Bitumen Stained Edwardian Tiled Hallway in Leyton E10 Read More »

Jerusalem Vinyl Tiled Kitchen Floor Before After Renovation Wanstead

Cleaning a Very Dirty Vinyl Tiled Kitchen Floor in Wanstead E11

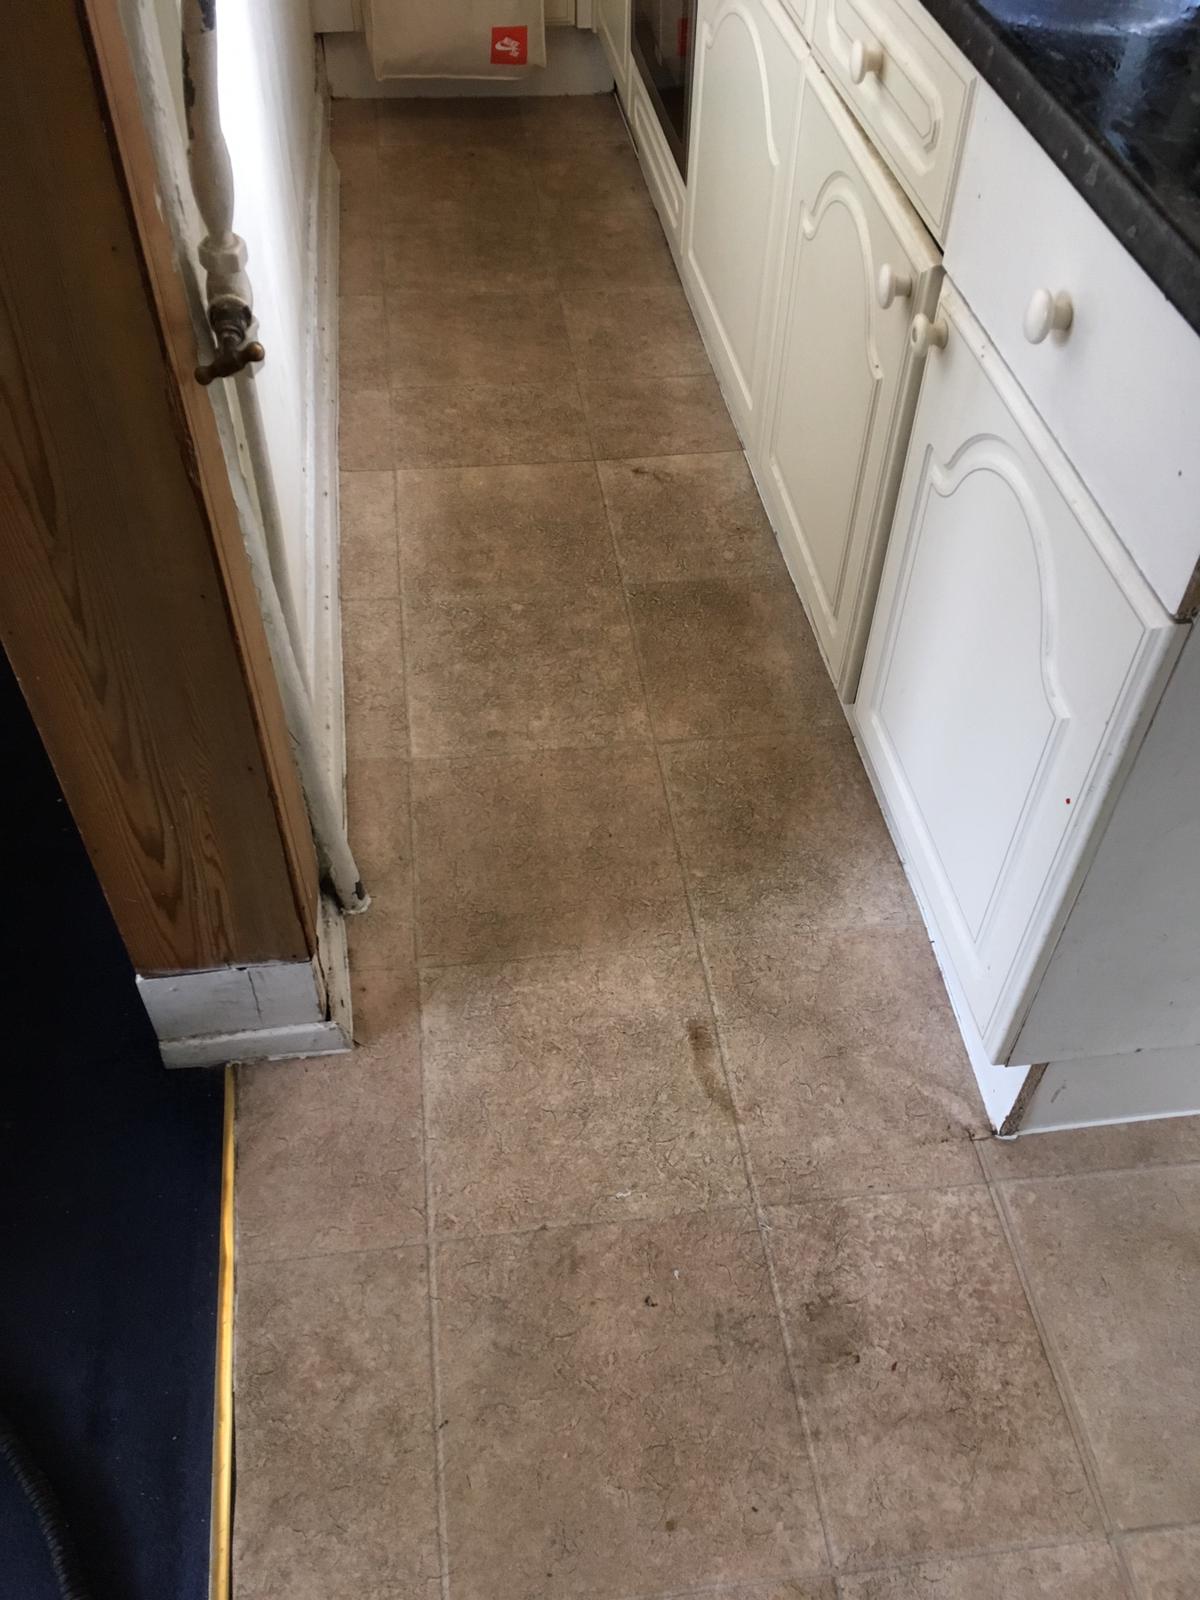
I was asked by the landlord of a flat in Wanstead, E11 to pop round and see if anything could be done to renovate the Vinyl flooring in the kitchen of the property. The existing tenant was due to move out and the pressure was on to get the flat renovated quickly so it could be put back on the rental market. Fortunately, I was working on a property nearby that week so I was able to arrange a convenient time to call in and survey the floor.

Vinyl Kitchen Floor Before Cleaning Wanstead E11

At first, I wasn’t sure what to make of the kitchen floor, but soon realised it comprised of square Vinyl tiles with a Terracotta appearance. Often these are Amtico or Kardean which are the main brands, but there are many others on the market. It was difficult to know for sure until after I had cleaned them as they were ever so dirty. Non the less I was confident the tiles could be cleaned, and after agreeing a price to carry out the work a date was agreed for my return later in the month.

Cleaning a Vinyl Tiled Kitchen Floor

To get the tiles clean I applied Tile Doctor Vinyl Strip diluted with ten parts water. This was left to soak into the Vinyl for roughly fifteen minutes before being scrubbed in with a black pad fitted to a rotary machine. The machine just about squeezed into the narrow kitchen but it’s a great time saver that is far more effective than scrubbing by hand.

The scrubbing action released a lot of dirt from the floor which was then rinsed off with more water and then extracted with a wet vacuum. This process was repeated until the floor was clean.

Sealing a Vinyl Tiled Kitchen Floor

It was only a small area so I force dried the floor with high powered fans so I could seal the tiles with Tile Doctor Vinyl Shine later that day. which would protect them and make them much easier to clean going forward. Tile Doctor Vinyl Shine is is a modern high solids polymer floor seal and polish, it is designed to protect and enhance the appearance of Vinyl floor tiles. The formula includes special polymers which can produce a ‘Wet Look’ finish when multiple coats are applied and it also increases the slip-resistance for the floor, which is vital in a kitchen.

Vinyl Kitchen Floor After Cleaning Wanstead E11

The floor looked really clean after I had finished and was completely transformed by the work, and as you can imagine my customer was amazed by the improvement. The landlord was seriously considering having to replace the floor and with this quick turnaround the flat would soon be back on the rental market.

In order to maximise the longevity of the sealer I recommend the use of Tile Doctor Neutral Tile Cleaner for day to day cleaning ultimately however it will be the tenants cleaning the floor.


Professional Restoration of a Vinyl Tiled Kitchen in East London

Cleaning a Very Dirty Vinyl Tiled Kitchen Floor in Wanstead E11 Read More »

Bathroom Ceramic Tile Grout Before After Cleaning Bow

Cleaning Ceramic Bathroom Shower Tile and Grout in Bow

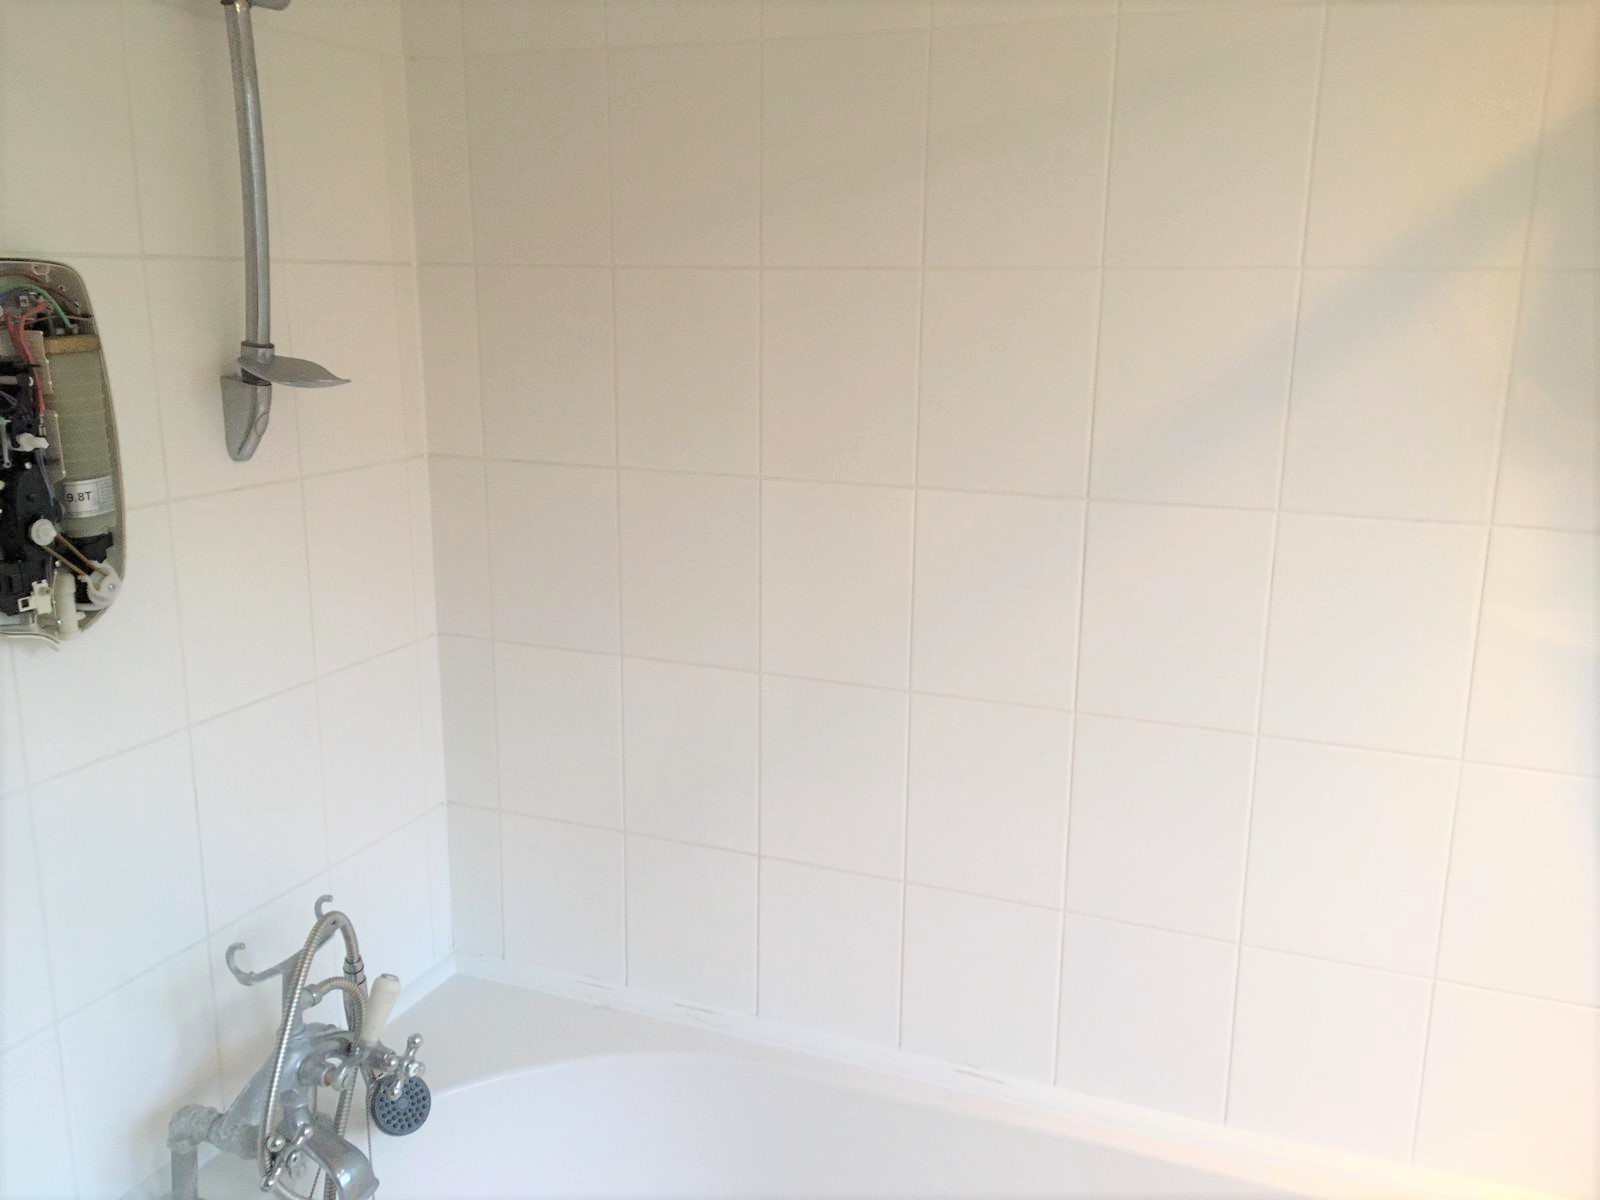
I was called to this property in Bow East London, because the grout around the shower had become dirty and had gone a yellowy/orange colour over time. This is quite a common problem with shower tiles due to the dyes you find in most shampoo and shower gel products. There was also some mould that needed removing. The ceramic tiles themselves were glazed ceramic which are very easy to clean but as usual the grout was bringing the appearance of the bathroom down.

Ceramic Tiled Shower Bath Tiles Before Cleaning Bow

The client was keen to see if the grout could be restored and had considered removing the grout and replacing it, but this takes time and I felt it would not be necessary. There are a number of Tile Doctor grout cleaning products I could have used to remedy these issues. I discussed the options with the client, and we agreed a price to complete the work.
Given the appearance of mould I decided to go with Tile Doctor Duo Clean which is designed for cleaning bathroom tiles and grout.

Bow is an area in the London Borough of Tower Hamlets in East End of London. It is mostly a residential area which is around 5 miles east of Charing Cross. It became part of the County of London following the passing of the Local Government Act 1888. “Bow” is an abbreviation of the medieval name Stratford-at-Bow, in which “Bow” refers to the bowed bridge built here in the early 12th century.

Cleaning a Ceramic Tiled Shower

Working in small sections from top to bottom the method I used to renovate the tile and grout was to spray the tiles and especially the grout with Tile Doctor Duo Clean. This product is designed for bathroom tile cleaning and comes with a spray head attachment, so it is ready to use. I then left the product to soak in for about ten minutes before scrubbing it in with a brush and then rinsed it off with water. It is always easier to clean tiles in this situation as the water can just drain away. In other areas we would need to use the wet vacuum to remove the soiled waste.

After repeating this process for the whole of the shower wall I then retreated any areas which needed more work until I was happy all the staining and mould was gone.

Sealing a Ceramic Tiled Shower Cubicle

The area was then dried and the only job remaining was the seal the grout which will prevent the grout staining going forward. To do this I spayed on Tile Doctor Wall Grout Sealer which comes in an aerosol and is very easy to apply.

Ceramic Tiled Shower Bath Tiles After Cleaning Bow

The client was very happy with the work, the bathroom was restored and looked much more appealing.


Professional Clean of a Ceramic Tiled Bathroom in East London

Cleaning Ceramic Bathroom Shower Tile and Grout in Bow Read More »

Travertine Tiled Floor Before After Refurb Mile End

Renovation of Travertine Floor in Mile End Rental Property

We recently renovated a Travertine tiled floor in the Kitchen of a rental property in Mile End, which is part of the Tower Hamlets borough of East London. My client was the Landlord and unfortunately the previous tenants had not maintained the Travertine floor very well. The grout was filthy, and the tiles were ingrained with dirt and had lost their shine which made for a very unattractive floor that was likely to put off a potential new tenant.

Dirty Travertine Floor Before Renovation Mile End East London

The stone floor was an expensive addition for my client who was concerned about the state of the tiles and of course worried that it would be difficult to find a new tenant with the floor in that condition. Naturally she wanted to have the Travertine tiles renovated as soon as possible so she could get it back on the market.

To keep a stone floor in good condition it’s important to maintain the sealer as once it degrades dirt becomes ingrained in the pores and it becomes difficult to keep clean. I was confident the floor could be restored and having agreed my quote I was able to complete the work the same week.

Cleaning a Travertine Tiled Kitchen Floor

I went over to the property and immediately set about deep cleaning and rebuilding the polish on the Travertine tiles using a set of diamond encrusted burnishing pads. I started with a 400-grit pad, followed by the 800-grit and then the 1500-grit. Each pad was applied to the tiles with water to lubricate the process rinsing and extracting the soil after each pad.

Next, I turned my attention to the dirty grout lines which I treated with a strong solution of Tile Doctor Pro-Clean which was left to dwell on the grout lines for a few minutes before being scrubbed in by hand. This was then rinsed off with water and again extracted with a wet vacuum.

Normally I would take two days to work on a floor like this, one day to clean and one day to seal however it wasn’t a large floor so I used a number of high powered fans to force dry the floor so I would be able to apply the sealer later that day.

Sealing a Travertine Tiled Kitchen Floor

Once the floor was dry, I then spray burnished the floor with a 3000-grit pad which further brought up the polished appearance of the Travertine, the last burnishing pad is applied dry with only a little water which is sprayed onto the floor as you polish.

After testing the floor for moisture using the moisture meter, I was happy it was dry, so I proceeded to apply two coats of Tile Doctor Colour Grow sealer. Tile Doctor Colour Grow is is a penetrating colour intensifying sealer that enhances the natural brown and cream colours in the Travertine whilst providing durable protection. Once the sealer had dried the floor looked great and had once again become a real asset to the property.

Dirty Travertine Floor After Renovation Mile End East London

It was dark outside by the time I had finished so apologies for the after photo, however I think you will agree the floor looks much healthier. Certainly, my customer was delighted to have the floor back to its former glory and with the floor looking like new it should achieve a good rent.


Professional Restoration of a Travertine Tiled Kitchen Floor in East London Rental

Renovation of Travertine Floor in Mile End Rental Property Read More »

=================================

East London Tile Doctor

================================= Read More »

Scroll to Top