
Original Victorian Encaustic Tiled Path Restored in Hornchurch
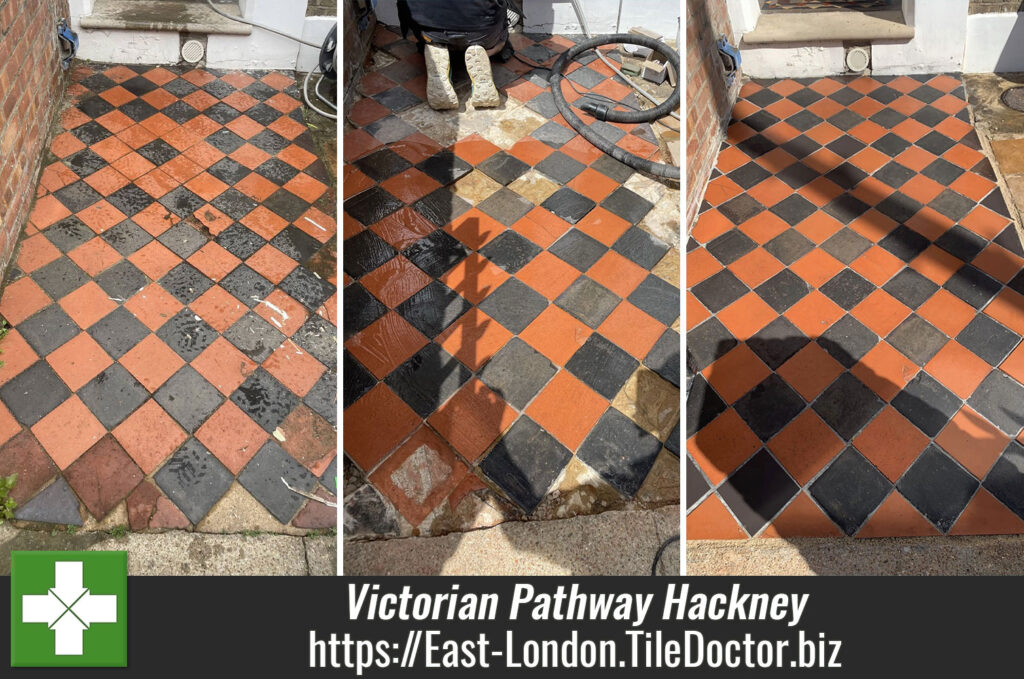
We received an enquiry from a homeowner in Hornchurch who had a late Victorian Encaustic tiled path leading up to the front door which was worse for wear and in need of restoration. The path had been exposed to the worst of the English weather and had several missing tiles that had come loose due to possible frost damage or movement.

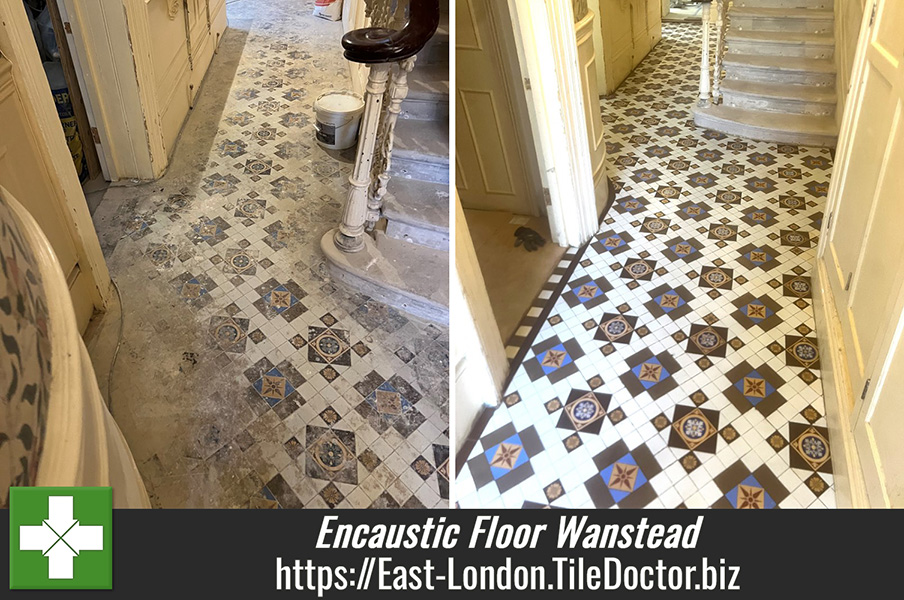
I do a lot of work restoring Victorian floors, so I offered to pop over, take a detailed look and provide a quote for its restoration. The path had been carefully crafted with a geometric pattern using multi-coloured brown, cream and blue encaustic tiles and a fine example that was well worth saving. Fortunately, the owner had a box of original tiles and was hoping that there would be enough to replace those that were missing.
I took a detailed look at the damaged areas and could see multiple sections were blown and cracked resulting in missing tiles and a damaged substrate. Those areas would need to be completely lifted; the foundation rebuilt and then tiles re-laid. I worked out a price for rebuilding the damage then deep cleaning and sealing the tiles to protect them from the weather. Happy with the quote I was given the go-ahead to start the work.
Cleaning a Victorian Encaustic Tiled Pathway
Work started with the rebuilding of the damaged areas and the careful removal of the tiles impacted. Once clear of tiling and debris a new section of sub floor was laid and bonded into the existing substrate, resulting in a structurally sound sub-floor.

The original salvaged tile pieced together with the spares then used to carefully rebuild the intricate pattern and restore the path to its original design. The tiles were dry fitted at first to get the pattern right and then fixed in place with a suitable adhesive.
The tiles were left overnight and then the following day intensively cleaned using Tile Doctor Pro-Clean worked in with a 100-grit then 200-grit diamond pad and water. The pads are applied using a rotary machine and the slurry generated is rinsed off with water and extracted with a wet vacuum.
Sealing a Victorian Encaustic Tiled Pathway
Once dry, the whole path was sealed with Tile Doctor X-Tra Seal which is a breathable oil-based sealer that’s rated for external use. I recommended Tile Doctor Neutral Tile Cleaner for maintenance.

Once complete, the path had a rich matte look which the customer really appreciated and left the following 5-star review:
Professional Restoration of a Victorian Encaustic Tiled Pathway in East London
Original Victorian Encaustic Tiled Path Restored in Hornchurch Read More »